Appendix Instructions
The frida-server executable to be run on the mobile device can be found from the following github repo: https://github.com/frida/frida/releases The chosen binary must match the architecture of the device which can be retrieved using:
adb shell getprop ro.product.cpu.abi
And pushed with:
adb push local-frida-server-path /data/local/tmp
And executed with:
adb shell chmod 755 /data/local/tmp/frida-server
adb shell /data/local/tmp/frida-server-binary-name &
https://github.com/dineshshetty/Android-InsecureBankv2. After cloning the repo, navigate into the AndroLabServer folder and launch the app.py script.
python2 app.py
Install the ‘InsecureBankv2.apk’ file to the device
adb install <path-to-apk>
Launch the app and configure the server ip and port. The default port should be 8888 and the IP should be set to the DHCP issued address of your NIC. If configured correctly, all subsequent login attempts should be logged and outputted by the app.py script. Default credentials for testing are: “jack:Jack@123$” and “dinesh:Dinesh@123$” minus the quotation marks. The will report whether it has detected a rooted device once a correct pair of credentials are submitted.
Visual Studio Code Installation instructions for Ubuntu:
Download the .deb package from the following page under the “.deb package (64-bit)” link.
https://code.visualstudio.com/docs/setup/linux
$ sudo apt install ./code_1.82.2-1694671812_amd64.deb
The program can then be launched by typing code in the terminal (should automatically be added to PATH):
$ code
To install the extension used to recompile, sign and install the app to the device, press CTRL+P inside of vscode and paste the following:
ext install Surendrajat.apklab
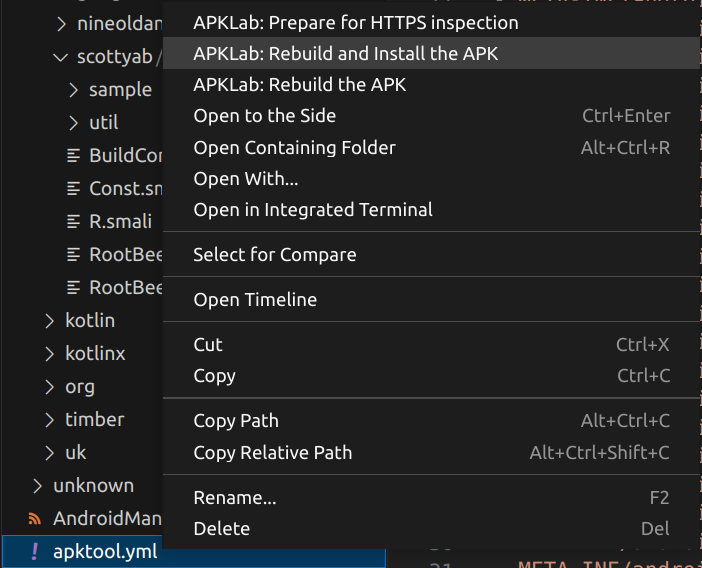
You can now right click on the apktool.yml file in the project files and select “APKLab: Rebuild and install the APK”.
Jadx-gui setup instructions can be found here: https://lindevs.com/install-jadx-on-ubuntu
NOTE: That java will need to be installed first; jadx supports any version between 8-18 (64-bit) inclusive.
sudo apt install java <– should give you suggestions for installing any version of java using apt.
As I installed the ‘headless’ version, there were libraries missing which means jadx-gui couldn’t run. To fix this use;
sudo apt install openjdk-[version]-jdk --fix-missing <– To install the missing components.
sudo apt install openjdk-18-jdk --fix-missing <– The actual command ran in my case.
The JAVA_HOME environment variable will need to be set in order for jadx to work. This variable should point to the java installation path which in my case was /usr/lib/jvm/java-18-openjdk-amd64
export JAVA_HOME="/usr/lib/jvm/java-18-openjdk-amd64"